
Introduction
in September 2025, I took part in a hackathon organized by Mistral in Paris. All the teams had to create an MCP server and integrate it into Mistral.
Though my team did not win anything, it was a fantastic personal experience! Additionally, I had never created an MCP server before, so it allowed me to gain direct experience with new technologies.
As a result, we created Prédictif — an MCP server allowing to train and test machine learning models directly in the chat and persist saved datasets, results and models across different conversations.

Given that I really enjoyed the event, I decided to take it a step further and write this article to provide other engineers with a simple introduction to MCP and also offer a guide on creating an MCP server from scratch.
If you are curious, the hackathon’s solutions from all teams are here.
MCP
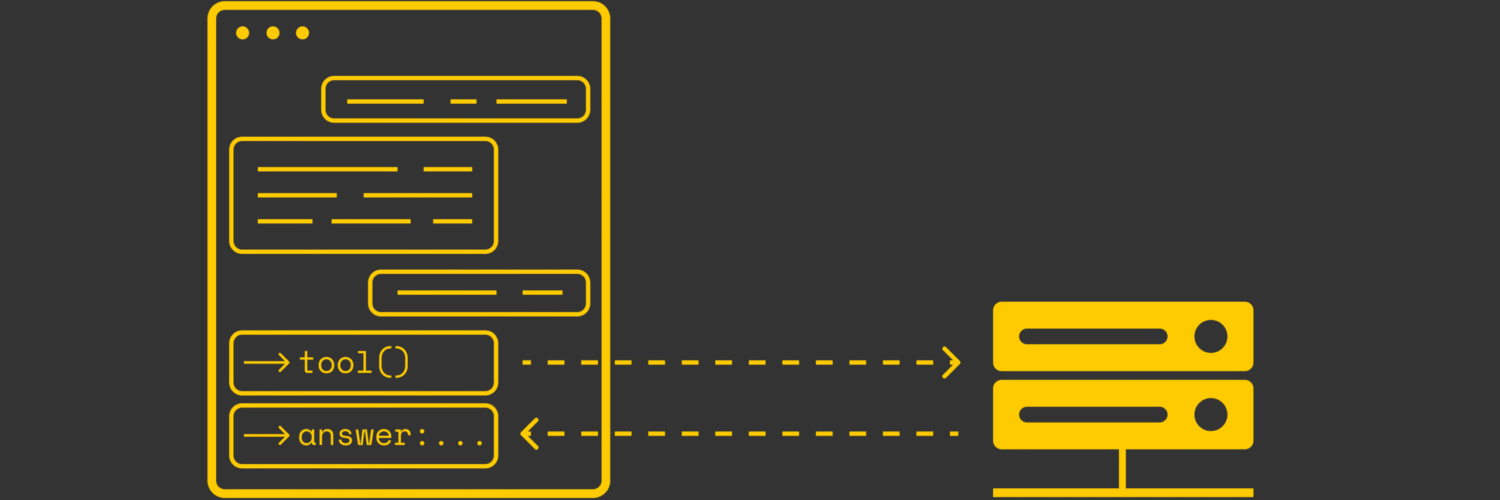
AI agents and MCP servers are relatively new technologies that are currently in high demand in the machine learning world.
MCP stands for “Model Context Protocol” and was initially developed in 2024 by Anthropic and then open-sourced. The motivation for creating MCP was the fact that different LLM vendors (OpenAI, Google, Mistral, etc.) provided different APIs for creating external tools (connectors) for their LLMs.
As a result, if a developer created a connector for OpenAI, then they would have to perform another integration if they wanted to plug it in for Mistral and so on. This approach did not allow the simple reuse of connectors. That is where MCP stepped in.
With MCP, developers can create a tool and reuse it across multiple MCP-compatible LLMs. It results in a much simpler workflow for developers as they no longer need to perform additional integrations. The same is compatible with many LLMs.

For information, MCP uses JSON-RPC protocol.
Example
Step 1
We are going to build a very simple MCP server that will have only one tool, whose goal will be to greet the user. For that, we are going to use FastMCP — a library that allows us to build MCP servers in a Pythonic way.
First of all, we need to setup the environment:
uv init hello-mcp
cd hello-mcp
Add a fastmcp dependency (this will update the pyproject.toml file):
uv add fastmcpCreate a main.py file and put the following code there:
from mcp.server.fastmcp import FastMCP
from pydantic import Field

mcp = FastMCP(
    name="Hello MCP Server",
    host="0.0.0.0",
    port=3000,
    stateless_http=True,
    debug=False,
)

@mcp.tool(
    title="Welcome a user",
    description="Return a friendly welcome message for the user.",
)
def welcome(
    name: str = Field(description="Name of the user")
) -> str:
    return f"Welcome {name} from this amazing application!"

if __name__ == "__main__":
    mcp.run(transport="streamable-http")
Great! Now the MCP server is complete and can even be deployed locally:
uv run python main.pyFrom now on, create a GitHub repository and push the local project directory there.
Step 2
Our MCP server is ready, but is not deployed. For deployment, we are going to use Alpic — a platform that allows us to deploy MCP servers in literally several clicks. For that, create an account and sign in to Alpic.
In the menu, choose an option to create a new project. Alpic proposes to import an existing Git repository. If you connect your GitHub account to Alpic, you should be able to see the list of available repositories that can be used for deployment. Select the one corresponding to the MCP server and click “Import”.

In the following window, Alpic proposes several options to configure the environment. For our example, you can leave these options by default and click “Deploy”.

After that, Alpic will construct a Docker container with the imported repository. Depending on the complexity, deployment may take some time. If everything goes well, you will see the “Deployed” status with a green circle near it.

Under the label “Domain”, there is a JSON-RPC address of the deployed server. Copy it for now, as we will need to connect it in the next step.
Step 3
The MCP server is built. Now we need to connect it to the LLM provider so that we can use it in conversations. In our example, we will use Mistral, but the connection process should be similar for other LLM providers.
In the left menu, select the “Connectors” option, which will open a new window with available connectors. Connectors enable LLMs to connect to MCP servers. For example, if you add a GitHub connector to Mistral, then in the chat, if needed, LLM will be able to search code in your repositories to provide an answer to a given prompt.
In our case, we want to import a custom MCP server we have just built, so we click on the “Add connector” button.

In the modal window, navigate to “Custom MVP Connector” and fill in the necessary information as shown in the screenshot below. For the connector server, use the HTTPS address of the deployed MCP server in step 2.
After the connector is added, you can see it in the connectors’ menu:

If you click on the MCP connector, in the “Functions” subwindow, you will see a list of implemented tools in the MCP server. In our example, we have only implemented a single tool “Welcome”, so it is the only function we see here.

Step 4
Now, return to the chat and click the “Enable tools” button, which allows you to specify the tools or MCP servers the LLM is permitted to use.

Click on the checkbox corresponding to our connector.

Now it is time to test the connector. We can ask the LLM to use the “Welcome” tool to greet the user. In Mistral chat, if the LLM recognizes that it needs to use an external tool, a modal window appears, displaying the tool name (“Welcome”) and the arguments it will take (name = “Francisco”).

To confirm the choice, click on “Continue”. In that case, we will get a response:

Excellent! Our MCP server is working correctly. Similarly, we can create more complex tools.
Conclusion
In this article, we introduce MCP as an efficient mechanism for creating connectors with LLM vendors. Its simplicity and reusability have made MCP very popular nowadays, allowing developers to reduce the time required to implement LLM plugins.
Furthermore, we have examined a simple example that demonstrates how to create an MCP server. In reality, nothing prevents developers from building more advanced MCP applications and leveraging additional functionality from LLM providers.
For example, in the case of Mistral, MCP servers can utilize the functionality of Libraries and Documents, allowing tools to take as input not only text prompts but also uploaded files. These results can be saved in the chat and made persistent across different conversations.
Resources
All images unless otherwise noted are by the author.
Source link


Add comment